середу, 6 липня 2011 р.

An Explosion of Brushes

This is probably the first tutorial I've put together based on an image taken by my iPhone. With camera phones taking much better pictures nowadays, we can use our phones as a design tool to capture textures and images anywhere, which can then be used to create interesting effects in Photoshop.

STEP ONE: Here's a photo I took while I was driving across a bridge in Tampa, Florida. I was intrigued by the clouds in the sky and just knew I had to capture it. I figured it would make a good cloud brush, but once I started playing around with it, I discovered something even more interesting. By getting creative with some brush settings and some layer styles, we can create a brush that looks like a fiery explosion. Lefs first set up the clouds to create a custom brush.
Open the image provided or an applicable image of your own. The first thing you'll notice is that the light pole is in the way. Grab the Lasso tool (L) from the Toolbox and draw a selection around the light pole. Then, press Shift-Delete (PC: Shift-Backspace) to open the Fill dialog. Choose Content-Aware from the Use drop-down menu and click OK. This will remove the pole quickly and easily with no trace.
вівторок, 5 липня 2011 р.

Boardwalk Empire Logo Effect

"Atlantic City, 1920: When alcohol was outlawed, outlaws became kings."What an awesome line! It's the headline copy used on the print ads for HBO's new series Boardwalk Empire. Not only is the headline great but the technique used on parts of their logo treatment is equally as cool. Check it out.

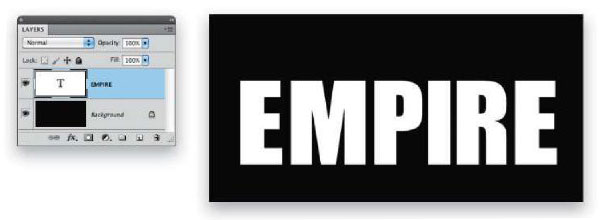
STEP ONE: In a new 12x4", 150-ppi document, press D to set the Foreground colour to black, and then press Option-Delete (PC: Alt-Backspace) to fill the Background layer with black. Press X to change the Foreground colour to white. Choose the Type tool (T) and enter your text (we're using the font Impact Regular at 246 points).

Harry Potter Photoshop Type Effect

By adding a hard, beveled-edged chiseled effect to a few type characters (along with a very unique font) the designers of the latest Harry Potter movie posters were able to create an eye-catching type treatment that captures the old-world London charm of the film's wizardry world setting.

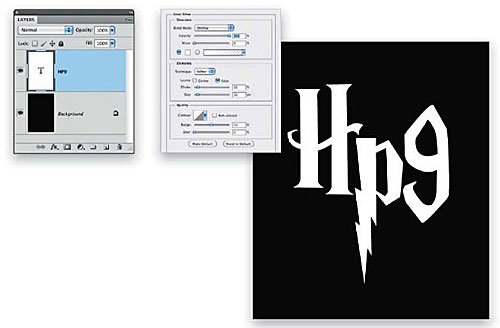
STEP ONE: Create a new 4x6", 150-ppi document, press D to set the Foreground color to black, and then press Option-Delete (PC: Alt-Backspace) to fill the Background layer with black. Press X to change the Foreground color to white, select the Type tool (T), and enter your text. (We're using the font Harry P, Regular, at 163 pt.) Adjust the baseline shift of the "P" and the "9" in the Character panel (Window>Character) to offset them from the "H." Go to Edit > Free Transform and drag the bottom middle bounding box handle to stretch the text. Click the Commit icon (checkmark) in the Options Bar when finished. Click on the Add a Layer Style icon (fx.) at the bottom of the Layers panel and choose Inner Glow. Choose Overlay for Blend Mode and enter 100% for Opacity. Click on the yellow color swatch, choose white as the color, and click OK. Enter 10% for Choke and 10 px for Size (you won't see any difference just yet). Note: There are several Harry Potter style fonts that will work for this tutorial, or you can just choose a bold, serif font for best results.